


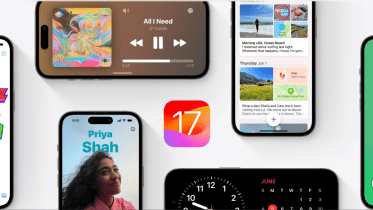
With iOS 17, Apple is enhancing the way one contacts the other. Its adding a number of features but one of the most notable one is the Contact Poster. Through this, Apple is letting its users to create their own unique digital calling card and allows them to be innovative through images, colours, and text.
Also Read: Screen Time limits fail on Apple devices, lets kids to spend more time
The benefit of contact cards can be accessed only by those who use iPhone. When one calls iPhone to iPhone, their contact poster would appear on the device of the one whom you are calling. This poster replaces the smaller thumbnail picture that was previously displayed. With this feature, you have the chance to be creative and let other people see you the way you want.
To be able to create Contact Poster, one needs to make sure that their device is running on public beta of iOS 17. Now, to access the Contact Poster, open the Contacts App -> Tap on your name -> Choose “Contact Photo & Poster.”
When you select the option, the users will first see the following things:
- Your first and last name.
- Whether you want to share your Name and Photo.
- If you want to share your poster automatically with your contacts.
- If you want it to ask you each time you call someone in your contact list.
After selecting all this, now is your chance to let out your creative flair. To create your Contact Poster:
- Select Edit -> click + (plus) symbol. When you swipe right, one will be able to see the “Create New” option. This is available at the far right of one’s existing Contact Poster.
- When you navigate to the bottom of the screen, select Camera for a new photo, Photos for choosing an existing photo, Memoji, or Monogram for text. This is a selection of type of Contact Poster one wants to create.
If you choose Camera or Photos, you can navigate the option through the following steps:
- Capture a new photo or select one from the library.
- You can swipe left or right or move between image and font styles.
- At the lower right, select the colour swab if you wish to change the colour for any effect.
- You can pinch in or out to zoom and crop.
- To change the font style, thickness, and colour, you can tap the text at the top.
If you choose Memoji, you can follow the following steps:
- Tap the + (plus) button to create a new Memoji or select one from the pop-up window.
- After creating a new Memoji or altering an existing one, you can tap the camera icon to select a unique expression and save it.
- On the following screen, you can choose a backdrop colour by tapping the colour swab in the lower left corner or change the Memoji picture while keeping the expression by tapping the icon in the lower right corner.
- To change the font style, thickness, and colour, tap the text at the top.
If you choose Monogram, you can navigate by following the steps below:
- To choose a background colour, tap the colour swab (bottom left).
- To change the font style, thickness, and colour, tap the text at the top.
- To edit the enormous typography in the centre of the poster, tap the letter(s) in the lower right corner. You can enter one or two characters (such your initials) in the text field.
Also Read: Your Apple Pencil may not work with iPad if you do “this”
After you are finished, tap “Done” and then “Continue” to view the preview screen. The main contact photo, the one used for your Apple ID across all of your devices and in other people’s contact lists, can then also be updated using your new Contact Poster.
Follow FE Tech Bytes on Twitter, Instagram, LinkedIn, Facebook


